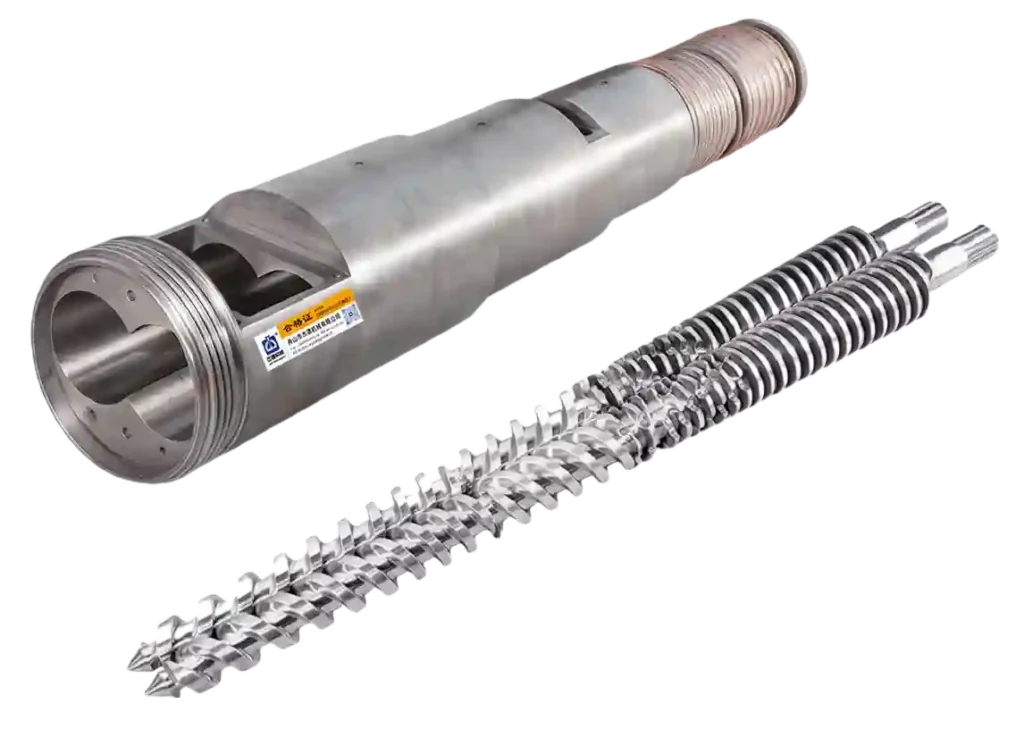


To determine if a conical twin-screw extruder is worn, the key is to observe four major signals: decreased output, deteriorated melt quality, abnormal energy consumption, and increased clearance. These are often early signs of wear and can be detected by operators even before the equipment is shut down.
Wear usually doesn’t happen suddenly but is a slow, cumulative process. The first and most obvious signal is decreased output: even at the same speed and feed rate, the output continues to decrease. Operators often instinctively increase the screw speed to compensate, but this exacerbates friction, leading to abnormally high melt temperatures and even localized degradation. This is a typical “energy-for-output” pattern, indicating that the radial clearance between the screw and barrel has exceeded the reasonable range (usually >0.35mm requires attention).
The second signal is deteriorated melt quality. Streaks, color differences, black spots, or uneven gloss on the extruded product surface indicate uneven plasticization of the material. This is because wear increases the effective volume of the screw channel, reducing the shear force of the material in the compression and metering sections, preventing sufficient melting and mixing. Especially when using fillers such as calcium carbonate and glass fiber, wear is accelerated because the hard particles directly scrape the metal surface, forming a “heavy wear zone.”

The third signal is increased operating noise or abnormal vibration. Wear-induced screw axis misalignment, or bending causing rotor rubbing, will induce periodic vibrations during high-speed operation. Vibration spectrum analysis can identify abnormal peaks at specific frequencies, which are precursors to mechanical alignment failure or screw deformation.
The fourth signal is visible scratches or localized dents on the inner wall of the barrel. In the four major heavy wear areas—the feeding zone, glass fiber reinforcement zone, intermediate zone, and screw head zone—if, after shutdown inspection, obvious grooves, metal peeling, or rust are found on the inner wall, it indicates that corrosion and mechanical wear are working in tandem. Especially under conditions containing moisture or oxygen, corrosion significantly accelerates fatigue wear.
If wear is suspected, professional inspection should be conducted:
Measure the inner diameter of the barrel using an inside micrometer and compare it to the original dimensions;
Measure the radial clearance between the screw thread and the barrel using a laser rangefinder or feeler gauge;
Check the straightness and coaxiality of the screw; if the deviation exceeds 0.05mm, correction is required;
Test the hardness of the nitrided layer on the screw surface using a Rockwell hardness tester; if it is below 58HRC, the surface reinforcement layer has failed.
Important Reminder: Minor wear can be temporarily maintained by increasing the speed, but this is an approach that “overdraws the machine’s lifespan.” If a sustained increase in melt temperature, the appearance of black lines on the product, or a decrease in output exceeding 10% is observed, the machine must be stopped for maintenance to prevent screw bending, gearbox overload, or even complete machine failure due to excessive clearance.